

How To Create Django Project In Pycharm
How to Create a Django Project with Pycharm IDE. Complete with Pictures!
![]()
Hi guys, wellcome to Djago Tutorial. ENJOY GUYS !
Django is a high-level Python Web framework that encourages rapid development and clean, pragmatic design. Built by experienced developers, it takes care of much of the hassle of Web development, so you can focus on writing your app without needing to reinvent the wheel. It's free and open source.
In this article I'll show you how to create a Django project with Pycharm Application. I'll be creating the simplest django project possible. I use Windows operation system to run the PyCharm.
Okay Guys, Let's begin….
1. Create New Repository on GitHub
To cre a te a new repository, click "New". Then, follow the steps which are shown below.

After create a repository, copy url on "Clone or Download"

2. Open the Repository with Git Version
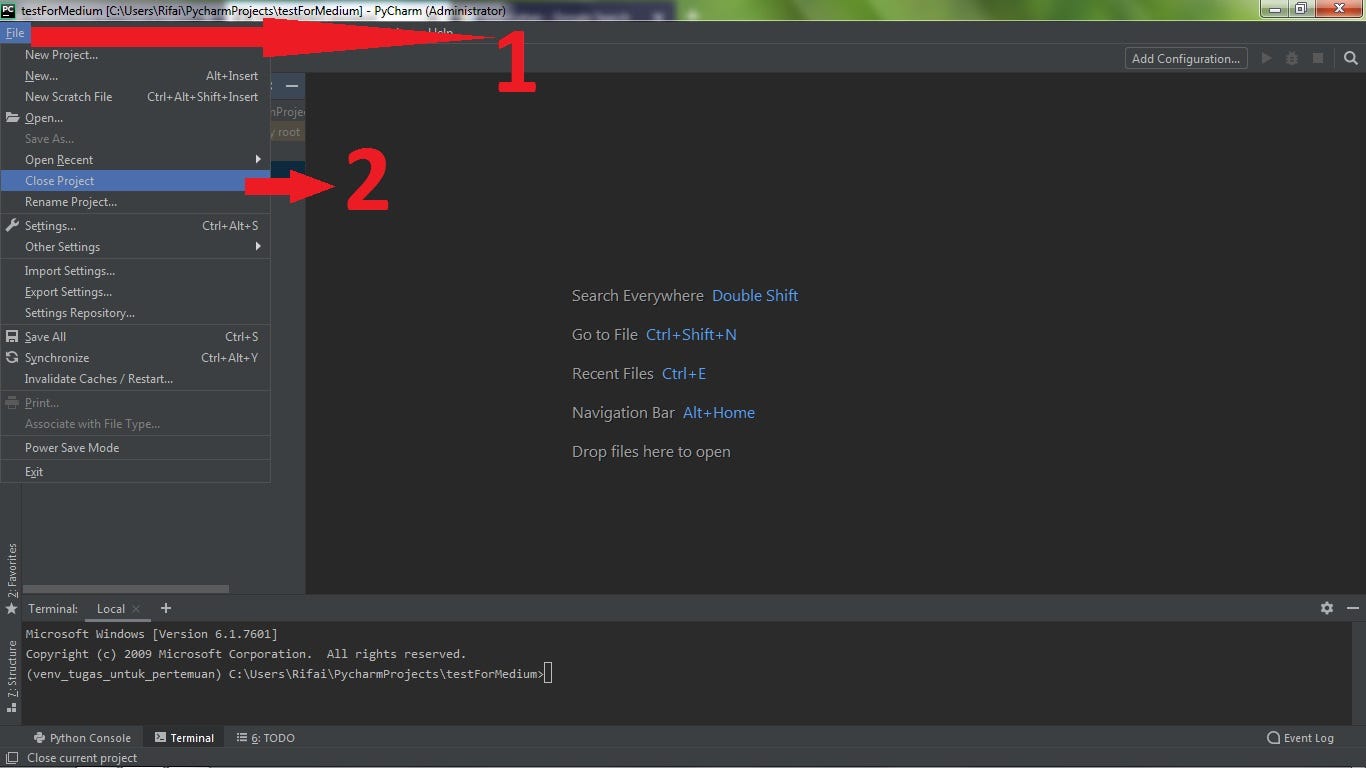
If you still open the pycharm project, change the version of the project to Git. Follow the steps below!

Paste the link in the column provided and click "Clone"

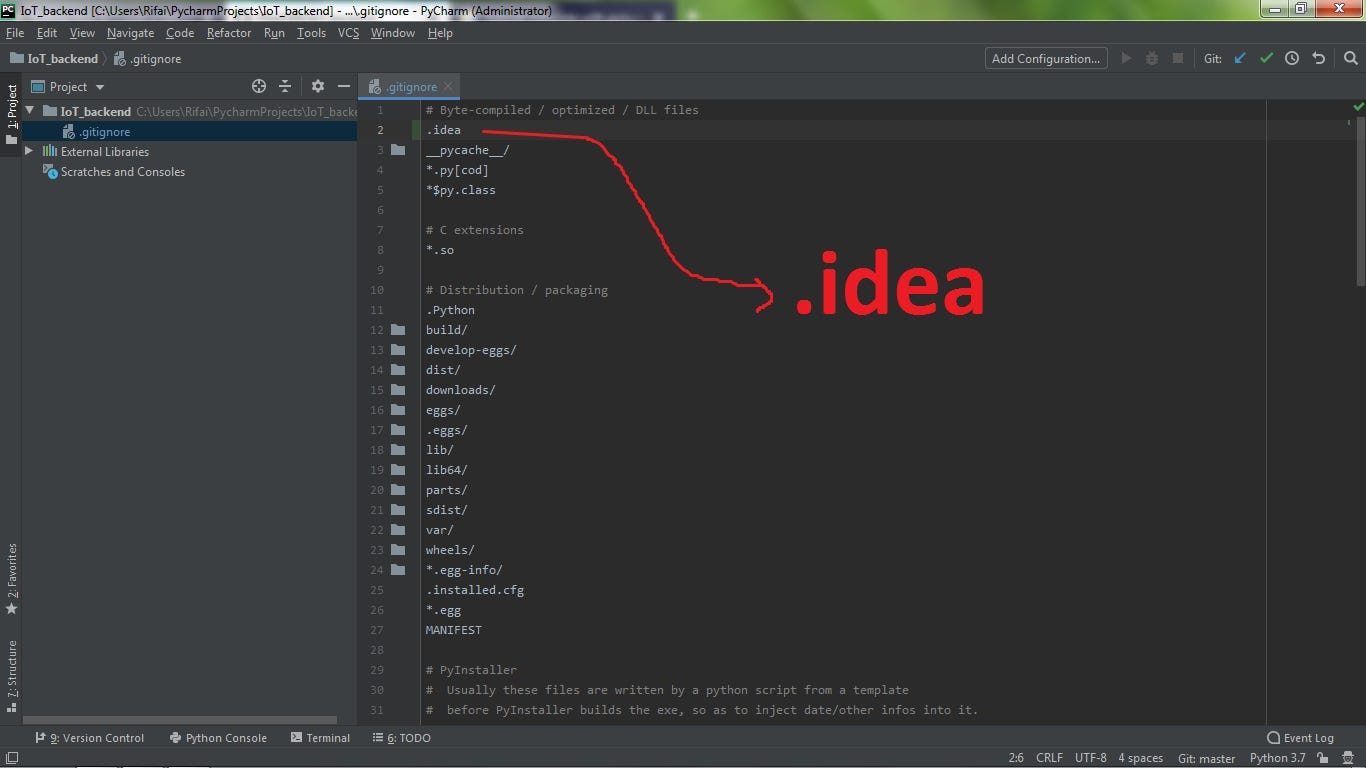
Open file ".gitigrone" then add a line ".idea"
3. Use Virtual Environment
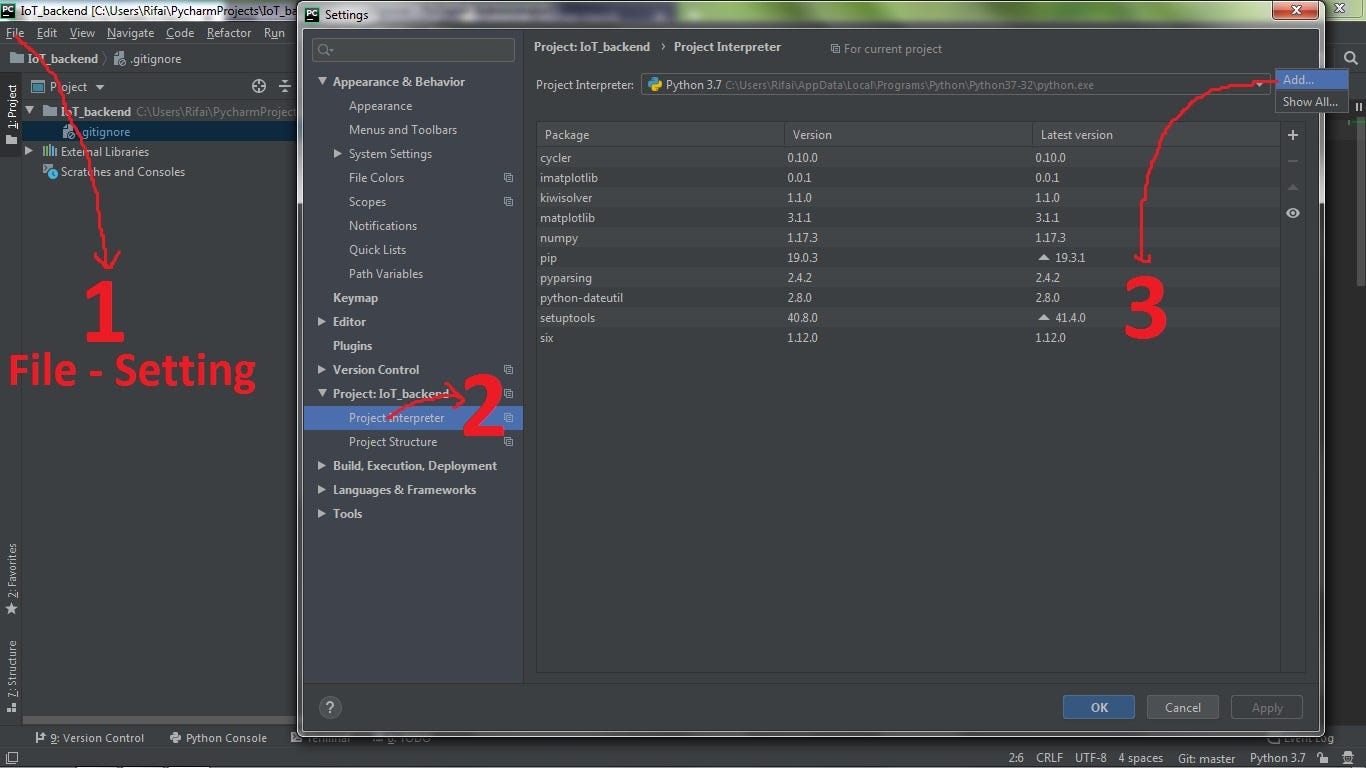
Use environment by click "File > Setting > Project > Project Interpreter >add" for details, follow the steps bellow.

4. Install Django
Open Terminal then install Django by typing "pip install django"
wait until the installing is finished
Then create a new text by typing "pip freeze>requirements.txt"
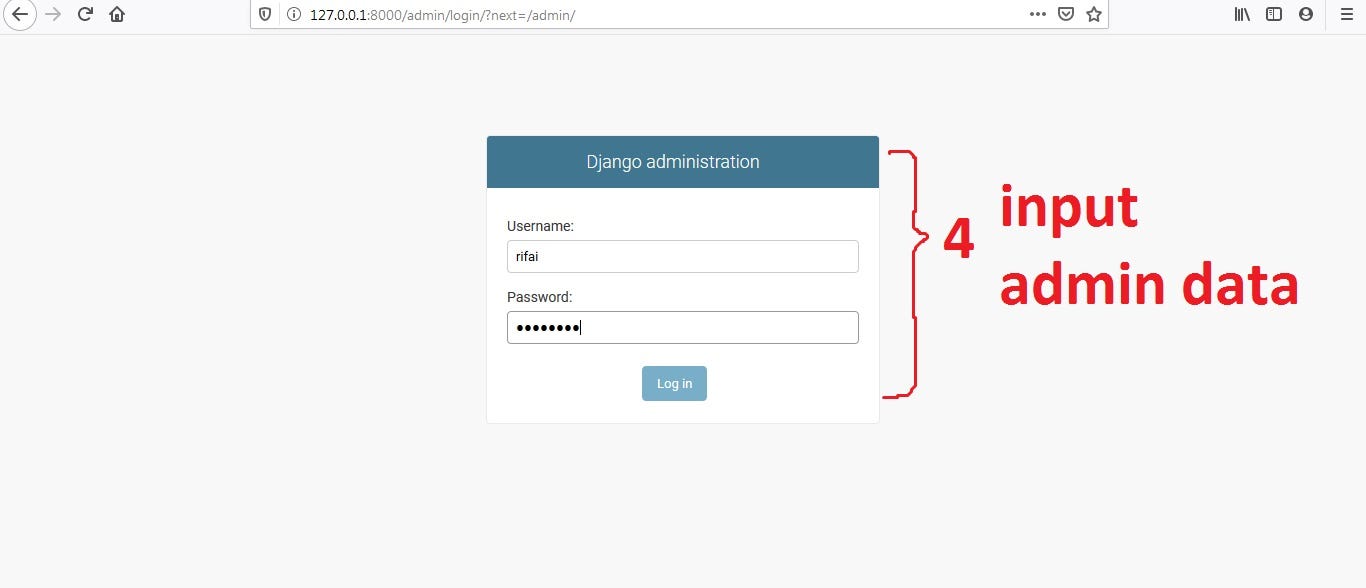
5. Create Admin Data
create a new project by typing "django-admin startproject io_backend ." on Terminal. After finished, migrate the file by typing "python manage.py migrate". Then, create user data by typing "python manage.py createsuperuser" enter username and password.
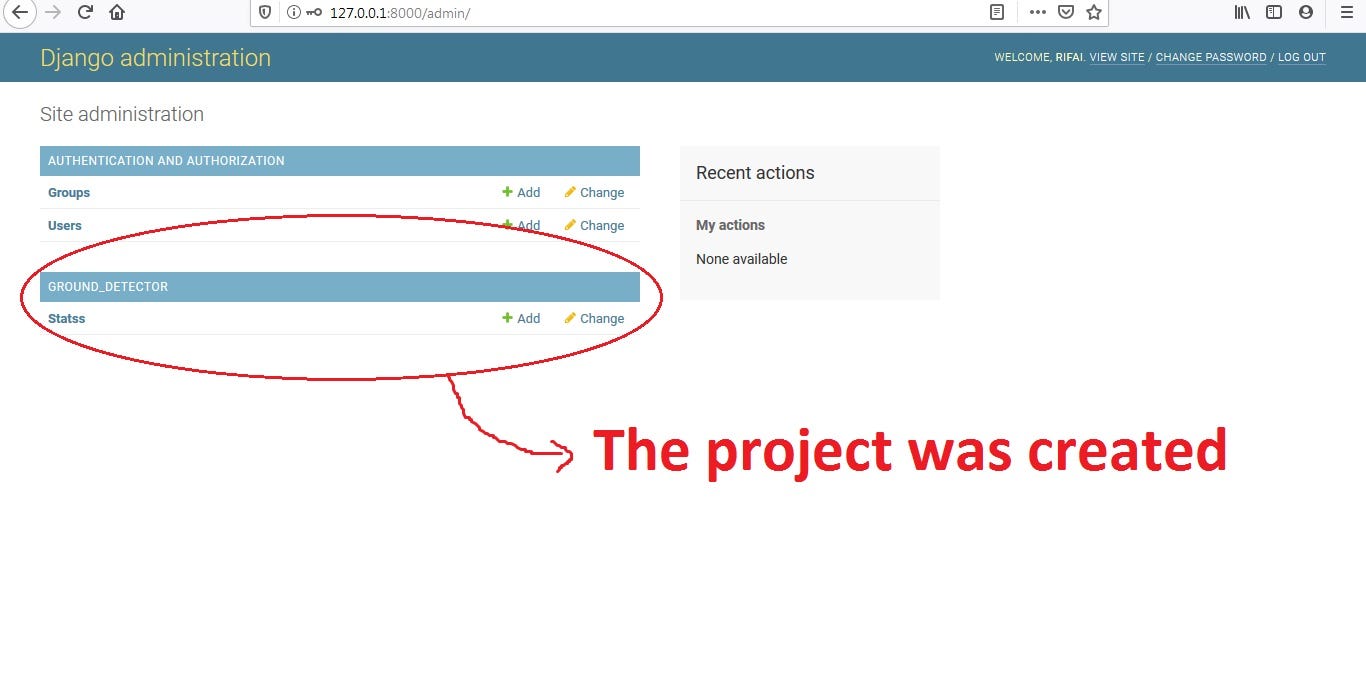
6. Create a Project
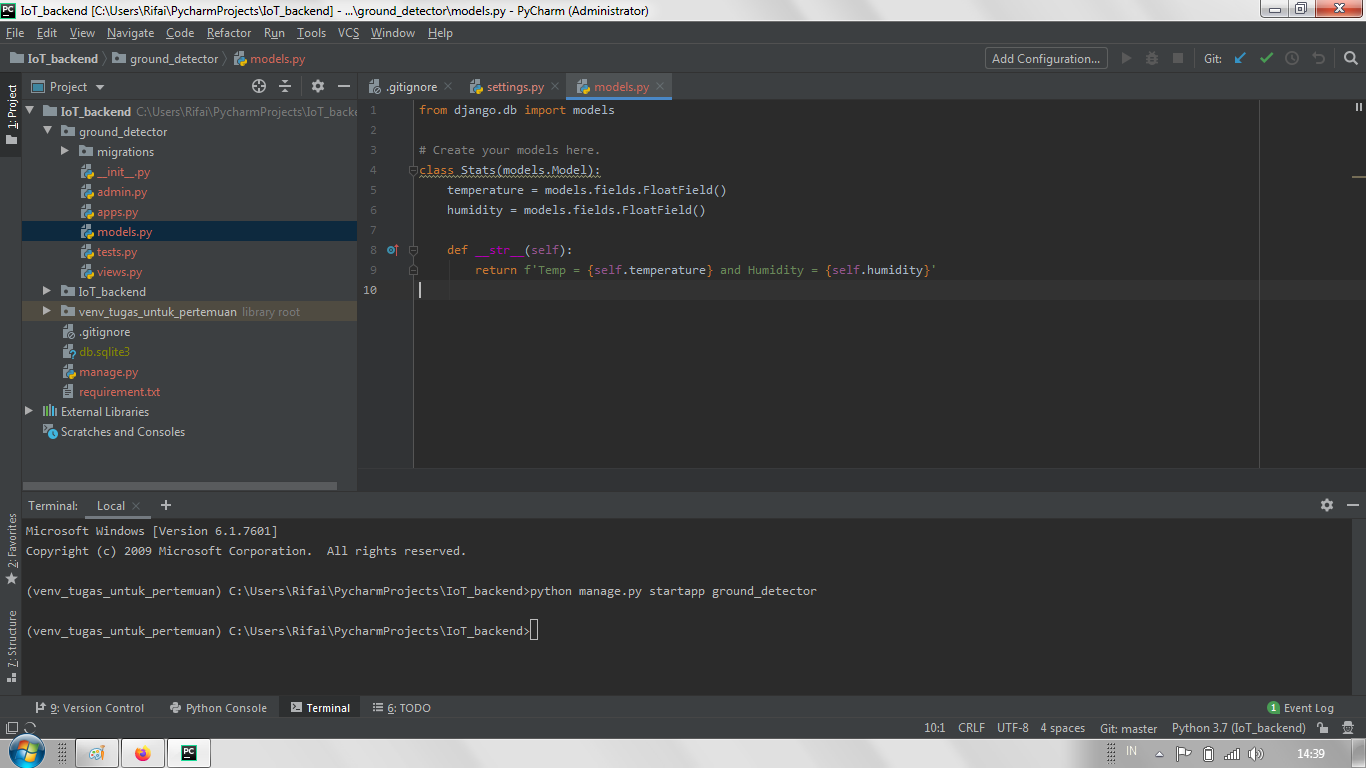
For example, I'll create a ground detector project. Type "python manage.py startapp ground_detector" on Terminal.
Then, open "setting.py" file in the "IoT_backend folder" and find "INSTALLED_APPS". Add an appication by "ground_detection". Follow the steps bellow.

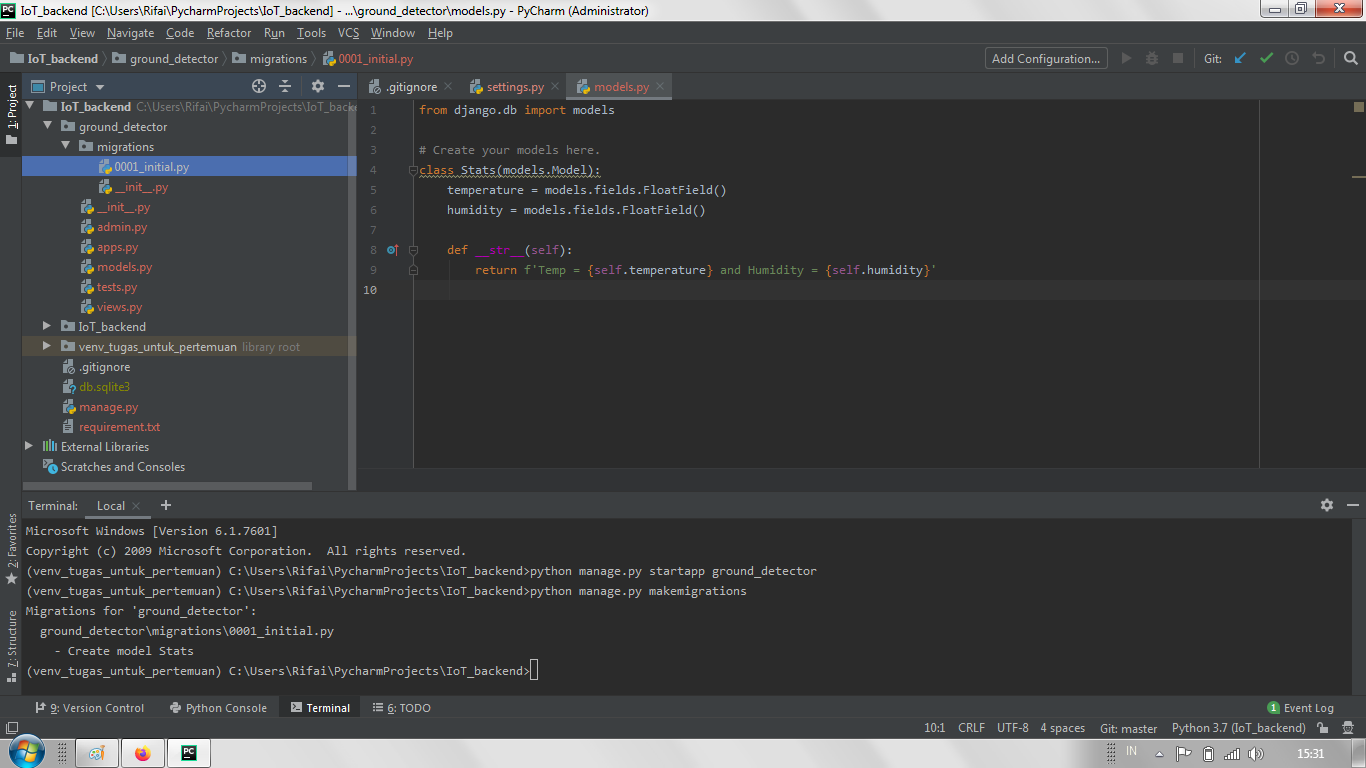
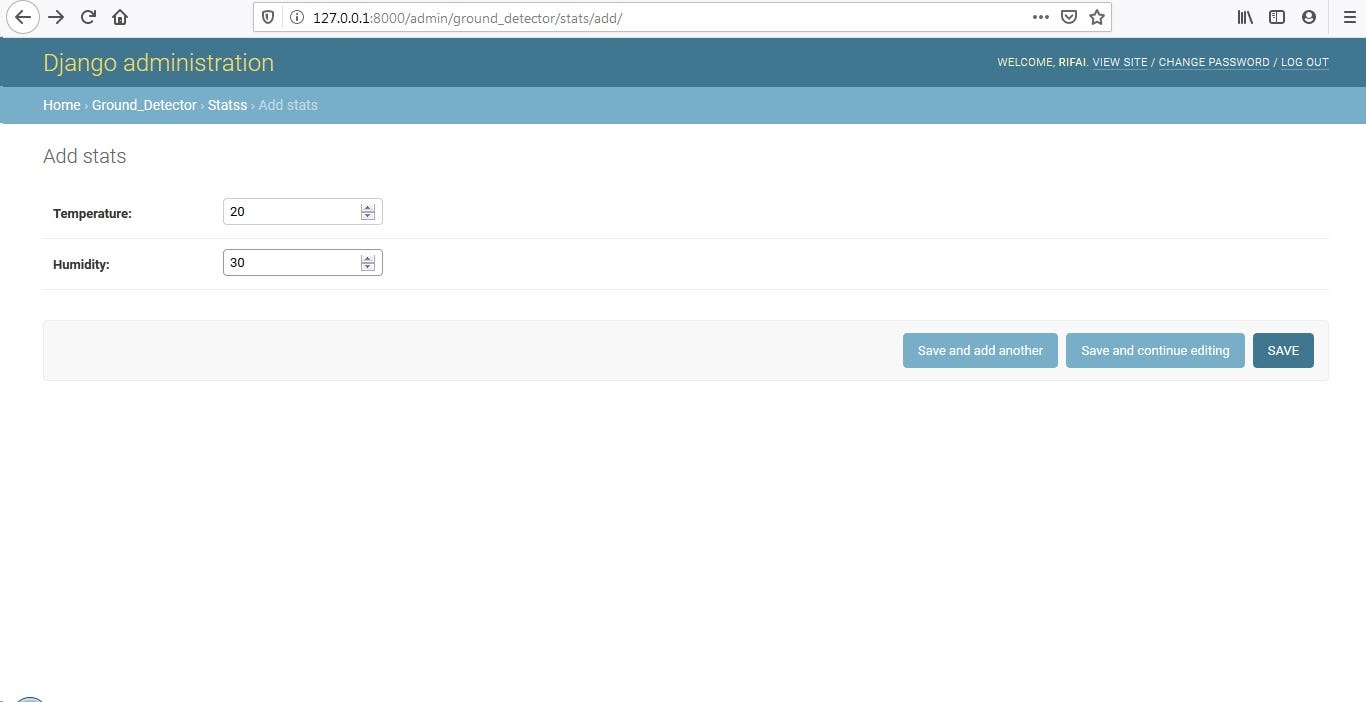
Open file "model.py" in ground_detector folder. Type the program as below.
class Stats(models.Model): def __str__(self):
temperature = models.fields.FloatField()
humidity = models.fields.FloatField()
return f'Temp = {self.temperature} and Humidity={self.humidity}'
7. Make Migrations
Make migrations by typing "pyton manage.py makemigrations" then "python manage.py migrate" on Terminal. Check in migrations folder available, there is a new file named "0001_initial.py"
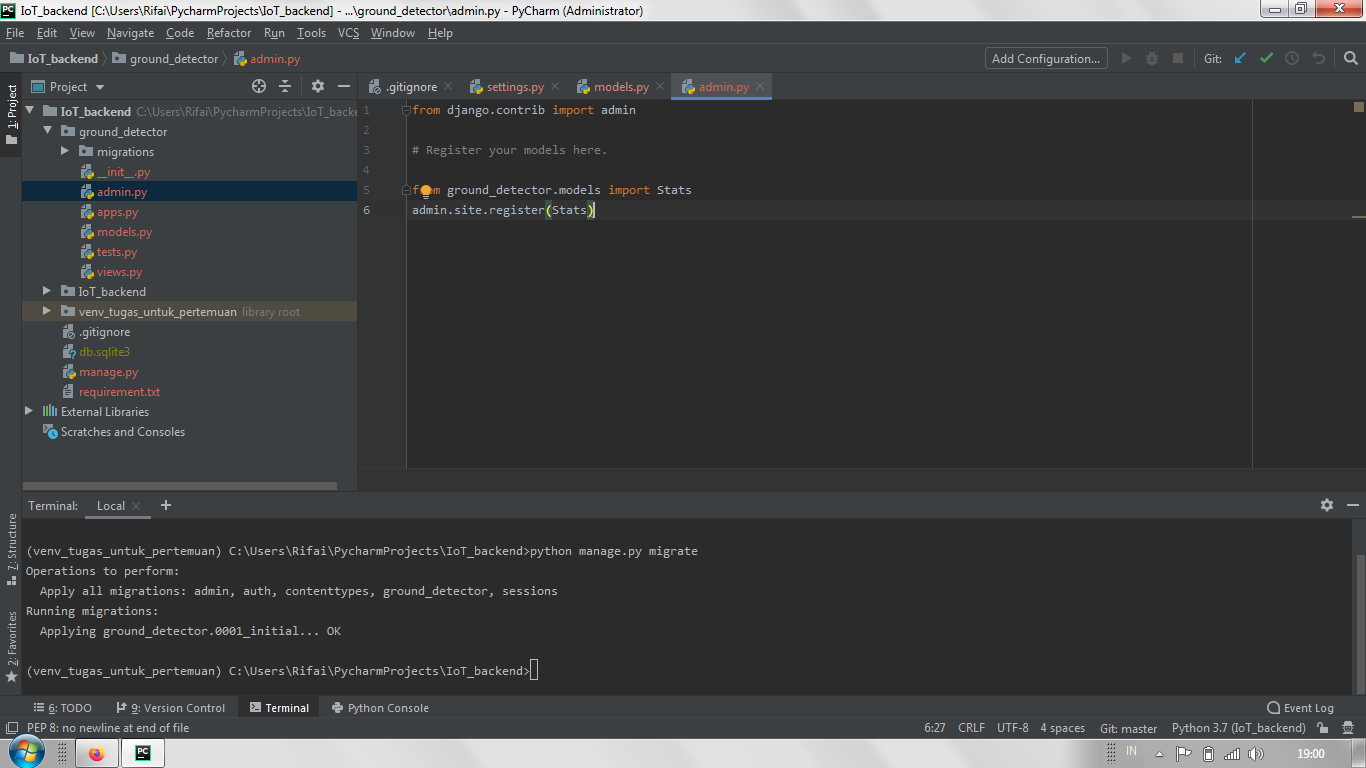
Open "admin.py" file in the "migrations" folder. And then register the models by typing :
from ground_detector.models import Stats
admin.site.register(Stats)
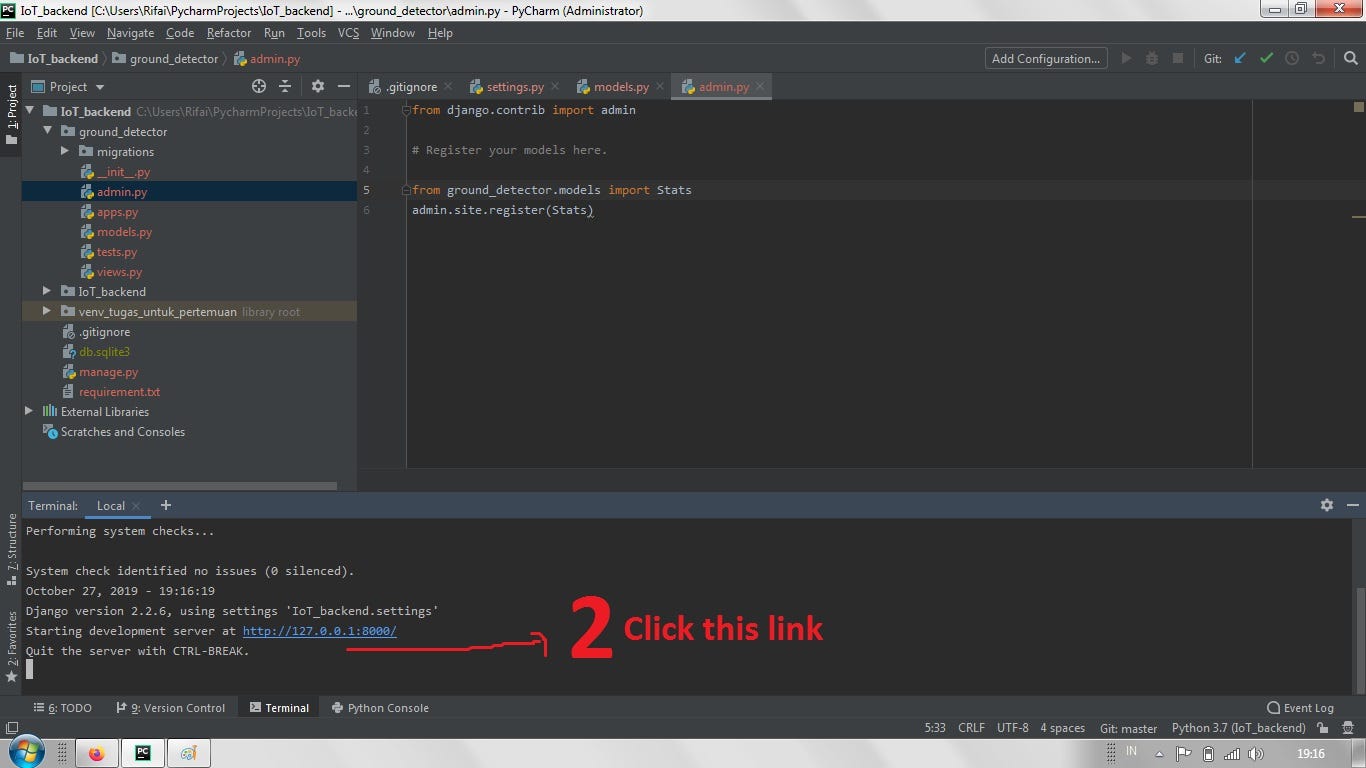
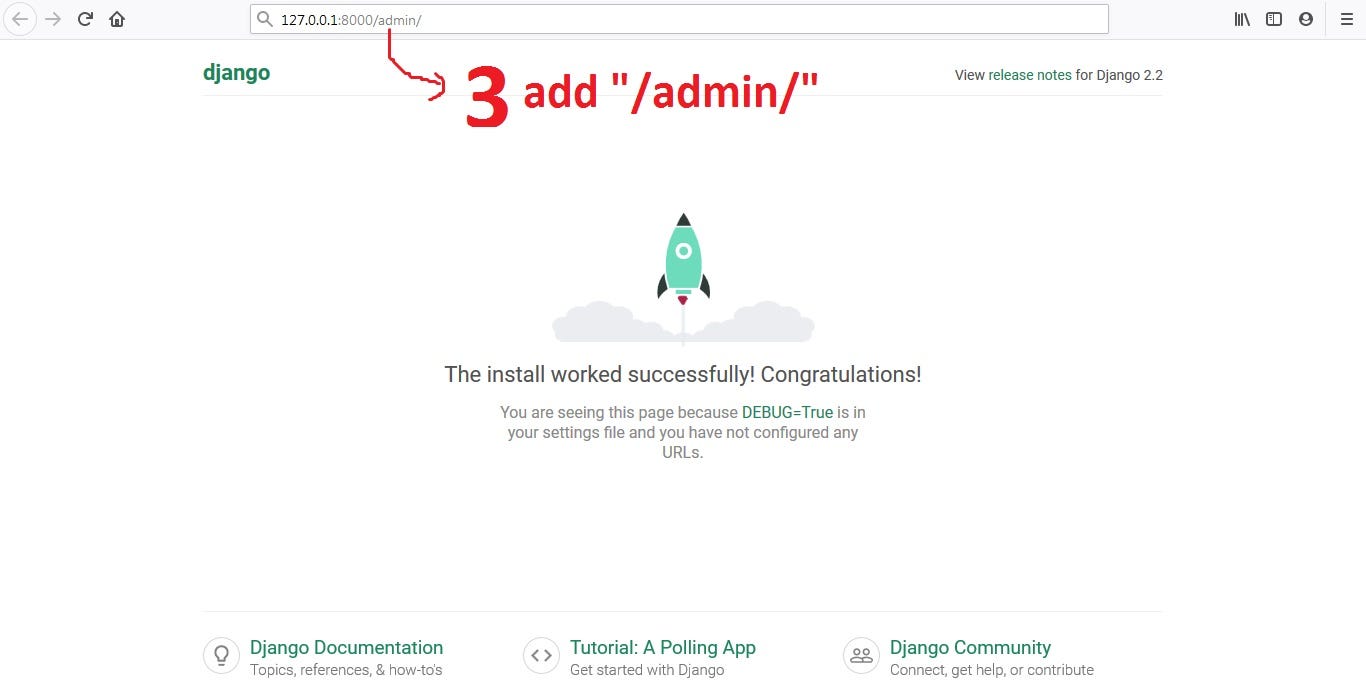
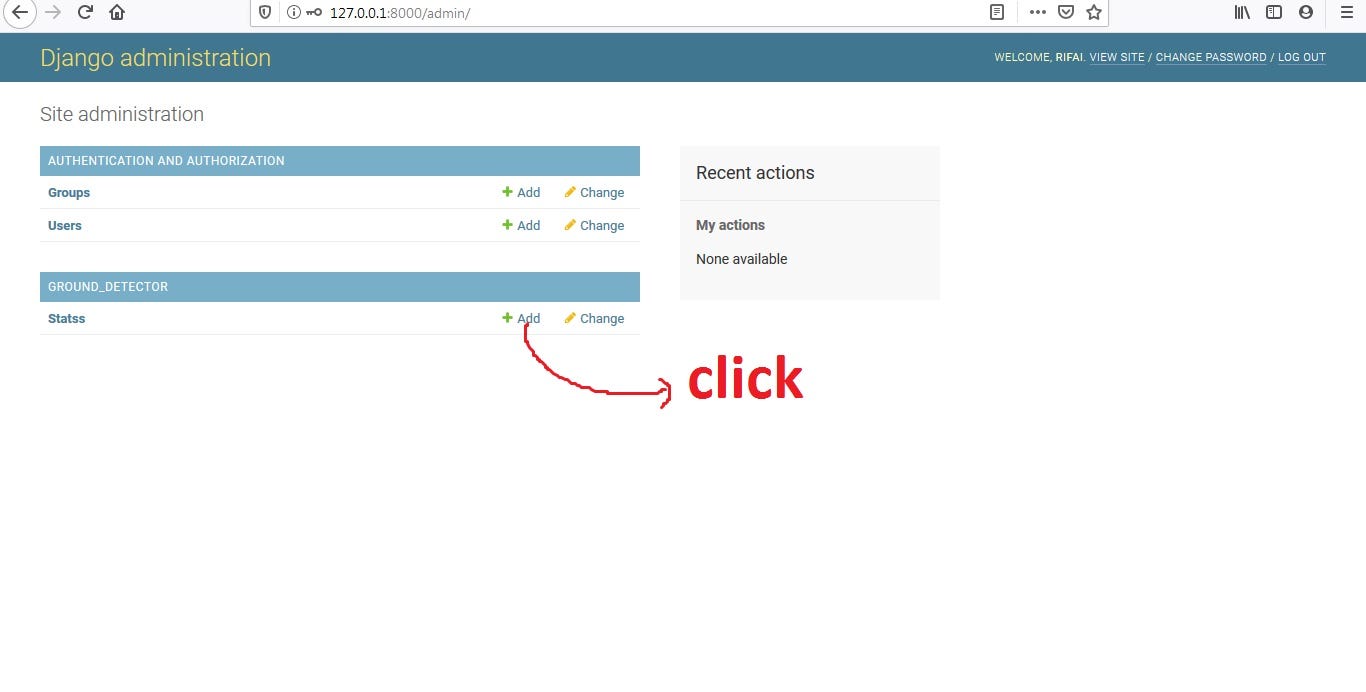
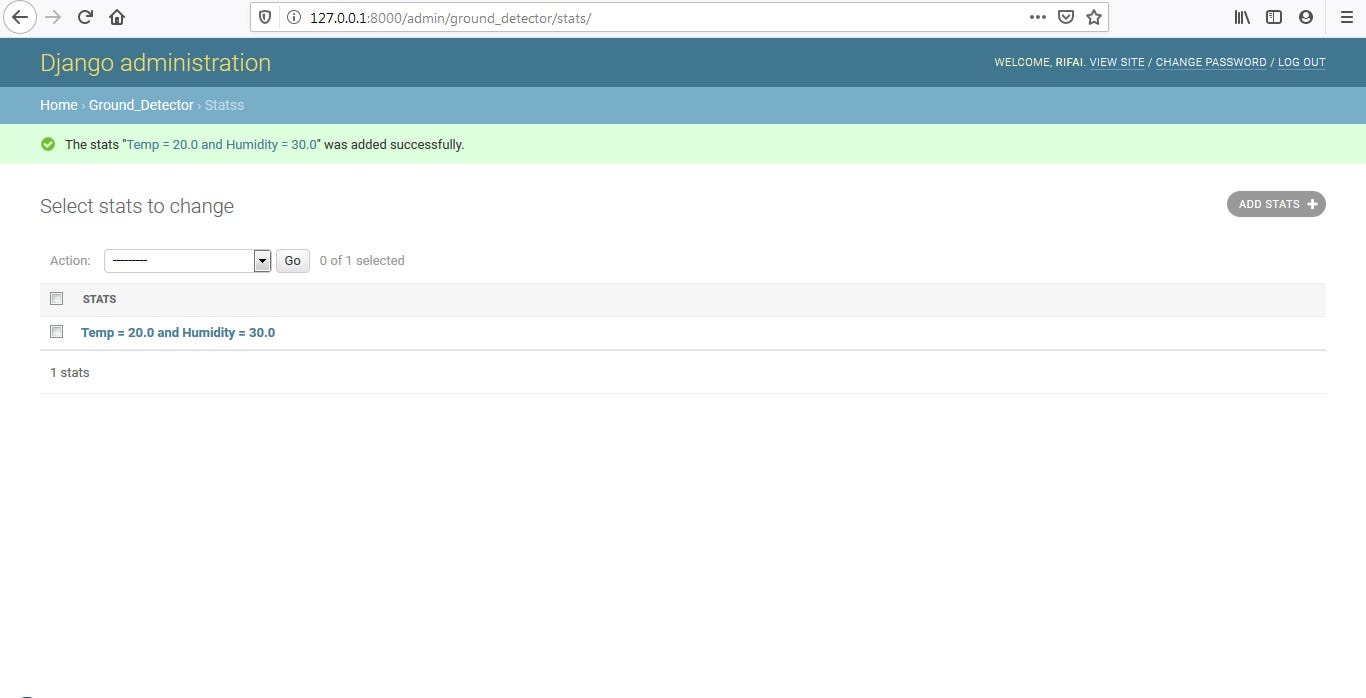
8. Run the Project on Django
Log in admin by typing "python manage.py runserver" on Terminal then click the url link. Now, you switch to the browser windows. On the url link, add url text by typing "/admin". Enter the data that has been created or you can seen the steps below.

This is the end of my tutorial. I hope we can take a good lesson from what I deliver today. I ask forgiveness for any words and behave which are not supposed to be. Thank you for your kind attention Guys. Stay tune for my next articles!:D
How To Create Django Project In Pycharm
Source: https://medium.com/@rifaislamet1509/how-to-create-a-django-project-with-pycharm-ide-e76bcfb1a865
Posted by: mccoolspearknigh.blogspot.com
0 Response to "How To Create Django Project In Pycharm"
Post a Comment